Steve's Camaro Parts

Steve's Camaro Parts

Wednesday, February 15, 2012

Steve's Camaro Parts - 1969 Chevy Camaro - Red Devil

 
Robert McGaffin

1969 Chevy Camaro Left Side
Mark Stielow has been at the leading edge of the Pro Touring genre since it began. Quite likely, it was one of Mark's cars that tipped the whole thing over. Anyone who's followed the 45-year-old's progress knows that Mark is smitten by the 1969 Chevy Camaro, so it has become the car to build for road race, slalom, 0-100-0 rips, and burning up the quarter-mile. Though his cars can be driven daily, they aren't-but that has always been Stielow's mindset when planning and building. It's the whole enchilada in one trick bag, or it's nothing.
Stielow: "The Red Devil was supposed to be my economical build after I had to sell Camaro X. I had a plan and was working to it: a basic Pro Touring '69 with DSE chassis and an LS7 engine. I was able to piece most of it together at a reasonable cost. I almost had all the pieces together and then went to SEMA last year. After I drove [Charlie Lillard's] Jackass at the Optima Street Car Challenge and saw the reaction of people to that car, I knew I needed more power than an LS7. I called my engine builder Brian Thomson and asked him about an LS9. He said that he'd done a 427 LS9 for a customer and asked me if I wanted to drive it. Well, like the [street] dealers say in Detroit, the first one is free ... I was hooked. I needed a 427 LS9. I told Brian to build me one."

1969 Chevy Camaro 7L Supercharged Corvette Engine
Mark found the car he wanted in Sacramento, California. He's the third owner. He was able to retain every bit of the stock sheetmetal but lightened the front end a bit with an aluminum cowl hood and aluminum front bumper. Reiter Metal Craft in Mt. Clemens, Michigan, did the initial metal repair, DSE mini-tubs, subframe connectors, and QUADRALink install. Joe Borschke at Stenod Performance in Troy installed the roll cage and exhaust cutouts in the floorpan. Mark couldn't have done this in the prescribed time frame without some help. He credits Ryan Kuhlenbeck for wiring the engine, chassis, and the antilock braking system. Dave Mikels tuned the package and, with Kyle Tucker's (DSE) pointers, Kevin Zelenka tuned the chassis.

1969 Chevy Camaro Fluid Caps
Thomson Automotive is in Redford, Michigan. Thomson Automotive makes serious power with LS engines (their dual-turbo 454 LSX makes a minimum of 2,000 hp). Proprietor Brian Thomson built the Devil's whiz-bang based on the LS7 cylinder block, which is 51 ci larger than the LS9. His plan included a Callies crankshaft, Oliver aluminum connecting rods, and Diamond 9.0:1 forgings. Do you need premium parts for a mere 10 psi of positive manifold pressure from the LS9 supercharger? Certainly not, but if you turn up the wick somewhere down the road, it's always better to be laughing than crying when the smoke clears.
Thomson readied the block with ARP studs instead of torque-to-yield bolts. He installed one of his blower cams (specs proprietary) with the LS9 rollers, pushrods, and every other bit of the LS9 valvetrain. The LS9 cylinder heads carry 2.160 titanium intake and 1.590-inch sodium-filled exhaust valves. Combustion chamber volume is an as-cast 68cc. For reasons of durability, reliability, and ground clearance, Thomson retained the LS7's 8-quart dry sump oiling and consummated the deal with a Peterson Fluid Systems tank (Henderson, Colorado). The top of the engine is piled with a 1.9-liter Eaton supercharger that cranks out 10 psi maximum with a 3:1 drive ratio.

1969 Chevy Camaro Brake Fluid Reservoir
The petrol supply trail begins at the Rick's stainless fuel cell that was modified to accept a Cadillac CTS-V fuel-sending module. A GMPP crate engine controller is teamed with Kinsler high-capacity fuel injectors, and monitored by a Kinsler FMU. Cooling is a very big deal for a car that does some very big things. A Griffin custom two-row radiator core is plied with fast-moving air via an electrically driven GM fan. The transmission and differential fluid temps rise exponentially on the road course and the 0-100-0 rips, so stop trouble before it starts, Stielow went with immaculate Weldon pumps for both issues.

1969 Chevy Camaro Lines
Though the stock LS9 ignition provides more than enough zap, the product of combustion is drawn to the outside by Kook's headers featuring 1 7/8-inch primary pipes. It flows through an X-pipe, Borla mufflers, and 3-inch stainless steel system. The dyno sheet that accompanied Mark's notes indicates 760 hp at 6,600 rpm and 810 lb-ft of animal torque at 3,900 rpm. At 2,500 rpm engine speed, torque is more than 600 lb-ft. One thousand rpm later, and you're now shoeing 800. How's that for flexibility and instant reflex?

1969 Chevy Camaro Gauge Instrument Panel
Throttling this much grunt on macadam is neigh impossible unless the driver is absolutely diligent on launch. Stielow is used to the terror hidden beneath the metal of his of '69 Camaros, so for him it's not much more than buckling up and motoring away. The real test is being able to drive out of turns straight and true with nothing more than haze from the 335s. D&D Performance fixed Mark up with a bullet-proof T56 taking torque from a Lingenfelter billet-steel flywheel and accompanying pressure plate in conjunction with LS9 twin clutch discs. A Dynatech aluminum driveshaft links the six-speed with the Currie 9-inch (TrueTrac helical-gear differential, 3.25:1 ring-and-pinion).
Where do you put a drivetrain as formidable as this? You could reinvent the wheel, or you could go straight to one of the most popular vendors in the Pro Touring realm. DSE sent spindles, upper and lower control arms, rack steering, a 1 1/4-inch bar, and its adjustable coilover shock absorbers at the nose cone. On the smoke-and- ash end, a complete DSE backdrop-QUADRALink 4-bar suspension, coilover adjustables, subframe connectors, and a hollow 1 1/8-inch bar. It's the job of all this stuff to tax hell out of the tires, so you'll need some big ones, pally. In this story, the Red Devil wears lightweight Fikse Profil 5S forgings that are 10 inches at the front and 12.5 inches at the back. Rubber accompanying is Michelin PSII, 275/35 and 335/30, respectively. Alternatively, the Devil sometimes spins Forgeline GA3 wheels shod with BFG KDW tires and dimensions identical to the Fikse/Michelin combination. The killer icing is the ABS system adapted from the LS9 Corvette. To our knowledge, this is first "hot rod" to be blessed with such an endowment. Watch for more of these conversions. They could become the darling of Pro Touring.

1969 Chevy Camaro Front
Stielow spends his daylight hours as an engineer at GM. His engineer buddy, Ryan Kuhlenbeck, does too. Ryan had been working on the Chevy Volt launch and Stielow had to go to Korea three times last spring. Do these guys sleep? Stielow says, "Needless to say, we were a bit busy. I sent all the body parts to Dutch Boys Hot Rods in Vicksburg, Michigan, manned by father Joe and 19-year-old son Paul VanNus-avid hot rodders, the both of 'em." The VanNus duo massaged the parts carefully, endlessly, and then Joe blew on the Standox VW Salsa Red, stepped back, wiped his brow, and turned out the lights.

1969 Chevy Camaro Interior
The car's man cave is Stielow-esque. It's tuxedo sharp and formally understated; all controls and levers are within arm and peripheral range, and nothing is in there that doesn't need to be. There are creature comforts; Stielow has spent way too much time sweating inside out, hence the Vintage Air HVAC system. Mark also craved audio to the max. He's got an Alpine setup but that's all we know about it. The door panels are GM repro. The steering wheel is a Sparco product. A shifter from a '06 CTS-V pulls the gears. Mark keeps tabs on the mechanicals via a bank of Auto Meter instruments sunk into a DSE dash panel. On the street and track, the ten-point cage and five-point Schroth safety harness plant Mark's gluteus maximus firmly in the high-zoot Recaro suede/leather seats. All the interior work was finished by the crew at All American Upholstery in Romulus, Michigan.

1969 Chevy Camaro Owner
Plan One was to finish the Devil and test it before the May 1 race at Road America, but these street fighters missed the first two events. Plan Two was to get everything hooked up and tied down for the Motor State Challenge, June 19-20, at Gingerman Raceway in South Haven, Michigan. On Thursday the 17th, Stielow pulled the jack stands, put all four tires on the ground, and drove the Devil straight to Belle's Tire for wheel alignment. There was a coolant leak and also a throttle mismatch problem that put the motor in limp-home mode. He made it to Brian's shop where Dave Mikels diagnosed and operated successfully.

1969 Chevy Camaro Pro Touring Camaros
Jack Ass and Red Devil: Two...
read full caption
The night prior to the race it stormed. The threat of hail scattered the gathering. The Devil found himself chasing Lillard, who was driving through the deluge at 80 in Jack Ass. Mark was tied to Charlie. Much to his chagrin, he discovered that the Devil had no windshield wipers! They got to the hotel, put the cars in their boxes, and went to the bar for a couple of beers. When the storm played out, they hit the freeway to see how the car ran. They had finally amassed the 200 break-in miles for the differential. "We tore up and down the highway a few times and thought it was good. It was better than good." The next morning, Mark qualified number one and won the road course portion of the MS Challenge. "Of all the car stuff I've done in my life, this is one of my best achievements," says Mark. "To take a basically brand-new build to the track and do well without having to do anything more than tighten one bolt made me very happy."

1969 Chevy Camaro Rear
What would Stielow do differently were he to build Red Devil (or most likely his next project) again? His little professor self says, "I would make a few of the parts a little lighter. Like the exhaust, which was built out of stainless steel I had lying around. It's 0.065-wall. I wish I would have purchased the 0.049 wall tubing to save 10 pounds." Yeah, you gotta love this guy.

source:
From the January, 2011 issue of Camaro Performers
By Ro McGonegal
Photography by Steven Rupp
 
 
Tags: camaro part, camaro parts, Camaro restoration parts, 69 camaro, 1969 camaro, aftermarket camero parts, chevrolet camaro, ss, z28, rs, chevrolet, restoration, 68 camaro, chevy, 67, 69, f-body, camaro, chevy camaro, chevrolet camaro, gm, z-28, 350, ls1, z/28, pace car, camaro ss, 69 camaro, first generation, copo, fbody, yenko, 67 camaro, 68 camaro, musclecar 


Friday, February 10, 2012

Steve's Camaro Parts - 1969 Camaro Dissasembly of 1969 Steering Column Lock Cylinders

Disassembly


1. Using a paper clip or similar gauge wire, fashion a tool by placing a 90 degree bend approximately 1/8 inch from one end of the wire.
2. The lock cylinder sleeve incorporates two separte brass plunger pins, approximately 180 degrees apart. Only one of these pins can be used to disassemble the lock cylinder.  The pin is adjacent to the tango on the anti-theft ring and is the incorrect pin to use (see figure 1)
3. The cylinder may be freed from the sleeve with the cylinder in either the "LOCK" or the "ACC" position.

    a. If the "LOCK" position is chosen, use the tool formed in step 1 to depress the correct plunger pin (identified in step 2) approximately 1/8 inch down into the sleeve housing as shown in figure 2. While depressing the pin and maintaining light upward pressure on the lock cylinder, rotate the cylinder counter-clockwise (toward the "ACC" poisition) until the cylinder pops from the sleeve.


    b. If the "ACC" position is chosen, the correct plunger pin (identified in step 2) is flush with the sleeve housing and is not visible. The pin is located directly above the stake mark as shown in figure 2. Using the tool formed in step 1, depress the plunger pin approximately 1/8 inch down into the sleeve housing while maintaining light upward pressure on the lock cylinder until the cylinder pops up from the sleeve.

4. Remove the lock key from the cylinder.
5. Tap the lower end of the sleeve on the work bench several times (on side containing the wire spring and retainer)  Remove the sleeve assembly, anti-theft ring and wave washer from the lock cylinder assembly.


source: Chevrolet Service News  Volume 41 - March 1969 - Number 3
   

Tags: camaro part, camaro parts, Camaro restoration parts, 69 camaro, 1969 camaro, aftermarket camero parts, chevrolet camaro, ss, z28, rs, chevrolet, restoration, 68 camaro, chevy, 67, 69, f-body, camaro, chevy camaro, chevrolet camaro, gm, z-28, 350, ls1, z/28, pace car, camaro ss, 69 camaro, first generation, copo, fbody, yenko, 67 camaro, 68 camaro, musclecar 


Wednesday, February 8, 2012

Steve's Camaro Parts - 1967 Instrument Panel Harness

The instrument panel harness has a new provision in the light switch wiring to facilitate the new safety standard that parking lamps will be 'On" whenever headlamps are on.  It also incorporates polarized or indexed connector cavities in the fuse panel to prevent improper instalation of connectors in the panel.  One basic fuse panel is common to all passenger cars. It has nine fused cavities and four connector cavities for increased capacity (Fig. 12-25).

Fusing has been rearranged to more evenly distribute the electrical loads.  The passenger car cluster is now fused separately and tailights are fused on a different fuse than the stop lamps and hazard switch.  This allows the rear lamps to function even if one of the real lamp fuses is blown.

The tabulation below summarizes the basic cicuitry.


The follwoing 1968 Accessory or RPO items obtain their power source by plugging into polarized receptacles in the face of the fuse panel:


The engine and generator & forward lamp harness are more positively engaged to the instrument panel harness (back of fuse panel) through the mating of the engine and generator & forward lamp connectors and an attachment bolt (se Fig. 12-25).


The circuit breaker amperage has been lowered from 40 amps (1967) to 30 amps (1967).  This will give added protection to power window, power top, and/or power seat motors and wiring.

Source: Chevrolet Service News Volume 39 September - October 1967  Number 9

YOU ARE NOT JUST BUYING PARTS – YOU ARE GETTING OUR CAMARO EXPERTISE

Tags: camaro part, camaro parts, Camaro restoration parts, 69 camaro, 1969 camaro, aftermarket camero parts, chevrolet camaro, ss, z28, rs, chevrolet, restoration, 68 camaro, chevy, 67, 69, f-body, camaro, chevy camaro, chevrolet camaro, gm, z-28, 350, ls1, z/28, pace car, camaro ss, 69 camaro, first generation, copo, fbody, yenko, 67 camaro, 68 camaro, musclecar 


Tuesday, February 7, 2012

Steve's Camaro Parts - Are Now in Moscow

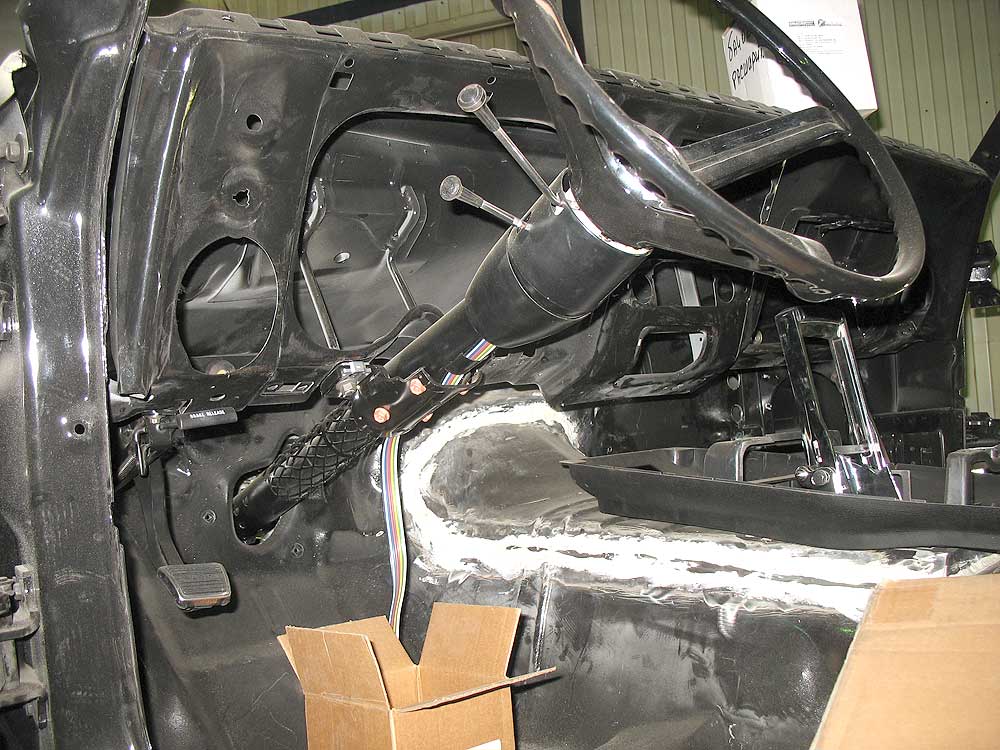
Steve's Camaro Parts now as their Camaro parts in Moscow.  Steve's recent customer was excited to receive their parts for their 1969 Camaro project.

See the pictures below:


 Car guys are World Wide!!!!

Tags: camaro part, camaro parts, Camaro restoration parts, 69 camaro, 1969 camaro, aftermarket camero parts, chevrolet camaro, ss, z28, rs, chevrolet, restoration, 68 camaro, chevy, 67, 69, f-body, camaro, chevy camaro, chevrolet camaro, gm, z-28, 350, ls1, z/28, pace car, camaro ss, 69 camaro, first generation, copo, fbody, yenko, 67 camaro, 68 camaro, musclecar 


Friday, February 3, 2012

Steve's Camaro Parts - 1968 Camaro Steering


Camaro production power steering gear housings, and all service replacement power gear housing, incorporate an internal stop in the form of a snap ring (Fig 9-1). When replacing, or when servicing the housing, this snap ring should not be removed even if the housing being replace did not have the stop.  Any attept to remvoe the snap ring will result in damage to the housing.

The snap ring serves as an internal stop for the rack piston when negotiating a right turn.  The left-turn stop is incorporated in the housing end plug.  End plugs are available in various thicknesses, to contro the gear travel adn are stamped wih degree of turn for identification purposes. 

The Camaro steering linkage components (steering arms, and pitman arms) are new to permit usage of a more common steering gear.  Steerign columns are new due to a change in the shift levers for the manual transmission equipeed vehicles.


source Chevrolet Service News - Volume 39 - September - October 1967 - Number 9

Tags: camaro part, camaro parts, Camaro restoration parts, 69 camaro, 1969 camaro, aftermarket camero parts, chevrolet camaro, ss, z28, rs, chevrolet, restoration, 68 camaro, chevy, 67, 69, f-body, camaro, chevy camaro, chevrolet camaro, gm, z-28, 350, ls1, z/28, pace car, camaro ss, 69 camaro, first generation, copo, fbody, yenko, 67 camaro, 68 camaro, musclecar 


Thursday, February 2, 2012

Steve's Camaro Parts - 1967 Camaro Transmissions


Transmissions for the Camaro included the 3-speed manual, 4-speed manual and Powerglide and Turbo Hyda-Matic automatics.  Base equipment with all 6-cyclinder and V-8 engines up to 350 cubic inches is the 3-speed manual unit, fully synchronized in all forward speeds. the 2.85:1 low gear ratio is used with 6-cylcinder engines. For the 327 and 350 cubic inch V-8's, the closer ratio 2.54:1 low gear transmission is standard equipment. A heavy-duty 3-speed manual transmission is available as an option for use with the 350 and 396 cubic inch V-8 engines.  For greater power train diversity, the 4-speed manual transmission is available, at extra cost, for 6-cyclinder modes as well as for V-8's. A heavier duty transmission is offered for the 396 and the new 350 cubic inch V-8 engines.  The Powerglide automatic transmission is available optionally with all engines up to 350 cubic inches.  Turbo Hydra-Matic is available exclusively with the 396 Turbo Jet V-8.

Shift controls for the standard 3-speed manual and automatic transmissions are located on the steering column. An option providing floor mounted controls and a console is available, except when the 3-speed manual unit is teamed with the 350 cubic inch V-8. Controls are floor mounted for the heavy duty 3-speed and all 4-speed manual transmissions, with the console an option.  For all manual transmissions with floor-mounted controls, the control assembly is attache to the partial frame rear cross-member, through an "L" shaped bracket, rather that the conventional transmission extension housing attachment,  for improved isolation from engine movement.

The Camaro features a one-piece balanced propeller shaft, with yoke and trunnion universal joints.

The Camaro rear axle has separate axle shaft tubes pressed and welded into a central cast differential carrier housing.  Standard gear ratios are designed for general purpose use, with optional economy, performance and special purpose ratios available.

Camaro clutch assemblies are the single dry-disc type with application force supplied by a diaphragm spring.

Source:  The Chevrolet Camaro
Donald H. McPherson, Charles M. Rubly, and Victor D. Valade


Tags: camaro part, camaro parts, Camaro restoration parts, 69 camaro, 1969 camaro, aftermarket camero parts, chevrolet camaro, ss, z28, rs, chevrolet, restoration, 68 camaro, chevy, 67, 69, f-body, camaro, chevy camaro, chevrolet camaro, gm, z-28, 350, ls1, z/28, pace car, camaro ss, 69 camaro, first generation, copo, fbody, yenko, 67 camaro, 68 camaro, musclecar 


Steve's Camaro Parts - 1968 Camaro Hidden Headlights

The Camaro (Fig.  12-13) headlamp system opens to the side as in the 1967 (of which most parts are a carry over).


The Camaro vacuum system (Fig 12-15) is like that of a Corvette headlamp system in that they use a vacuum reserve tank with capacity for one and half cycles without the engine running, a vacuum relay valve and an actuator.  The actuator is a piston type rather than a diaphragm type.  This piston moves to the vacuum side of the actuator as directed by the relay valve.  There is no manual valve in the cluster are of the Camaro system.


Instead there is a provision on the relay valve that when moved to one side will vent the relay valve diaphragm to atmosphere. This in turn will cause the relay valve to move and route vacuum to the open side of the actuators;  consequently opening the headlamp doors.  As with the Corvette vacuum system, the headlamp doors on the Camaro can be manually opened in the event of malfunction as follows:

(Fig. 12-18) Pull outer edge of the door towrds the center of the car until the door locks in open position.


Provisions for headlamp alignment are the same as units with the hideaway feature. Door adjustments are accomplished through shims, slotted holes, and floating cage nuts (see Figs 12-13).

It is recommended that the headlamp doors and windshield wiper access door be set in open position during vehicle operation in inclement weather to avoid freezing of the doors in closed position.

source: Chevrolet Service News  Volume 39, September-October 1967 - Number 9


Tags: camaro part, camaro parts, Camaro restoration parts, 69 camaro, 1969 camaro, aftermarket camero parts, chevrolet camaro, ss, z28, rs, chevrolet, restoration, 68 camaro, chevy, 67, 69, f-body, camaro, chevy camaro, chevrolet camaro, gm, z-28, 350, ls1, z/28, pace car, camaro ss, 69 camaro, first generation, copo, fbody, yenko, 67 camaro, 68 camaro, musclecar